Showing posts with label cheesecake. Show all posts

Tuesday, November 17, 2009

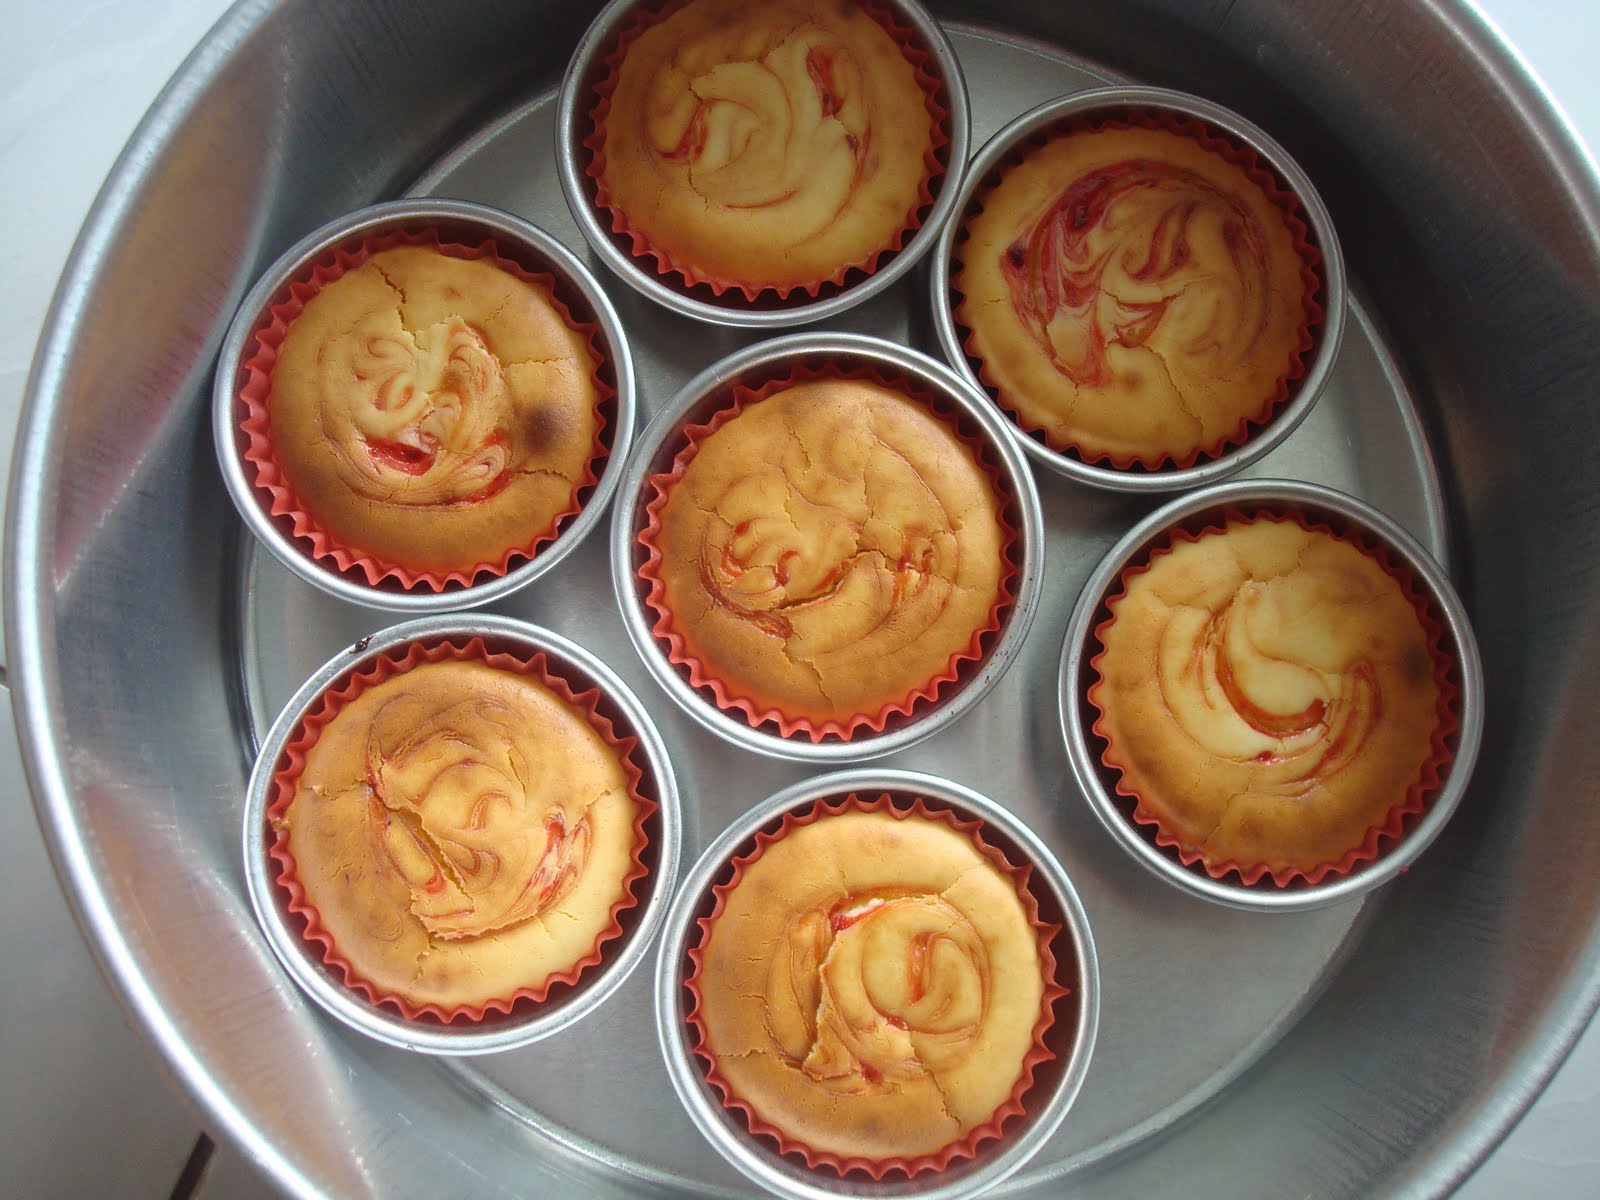
Mini Strawberry Swirl Cheesecake


The good things about mini cheesecake is you do not have to slide them before serving as cutting cheesecake is quite a troublesome work to me. Secondly, it is easier as the crust making process can be skipped, substituted by mini marie biscuits or any cookies that is small enough to fit into the baking cup. You can use muffin baking cup or cupcake baking cup or any mini size baking cup as long with paper lining. I first tried by putting a lump of strawberry pie filling on top of the cheese but i found it slightly sank into the cheese after bake. Putting the strawberry pie filling on top of the biscuit worked better. Just use a tooth pick and do a swirl effect after filling the cheese is good enough to get a nice apperance. The disadvantages for this mini size cheesecake is one need quite a number of baking cups. I only have a dozen of baking cups so i took 6 rounds for baking. Plus, you need sometimes to let it cool down a bit before removing the cake from the baking cup for the next refill.

I slightly modified this recipe from cookingforengineer website.

Prepare Time: 1 hour
Bake Time: 45-1 hour
Serving: 60 pieces and some left overs

Ingredients:
Philadelphia cream cheese 1kg
Fine sugar 1 cup
Eggs 4 pieces
Strawberry pie filling 300gram
Mini Marie Biscuits 60 pieces

Instructions:
1. Rest cream cheese at room temperature for at lest one hour to ease the later blending process and also to avoid lump.
2. Cut the cream cheese to cubes to fasten the blending process and avoid lump.
3. Beat the cream cheese until smooth and add in sugar and beat until the sugar is fully dissolved in the cheese.
4. Scape down the cream cheese at the mixer side wall.
5. Add in eggs one at a time and beat well. Repeat for all the eggs.
6. Place the paper liner on the muffin cups.
7. Place the biscuits into the muffin cups.
8. Place a teaspoon of strawberry pie filling on the biscuits.
9. Spoon cream cheese mixture into the muffin cups for 3/4 full.
10. Preheat the oven at 175C and add a tray of hot water into the oven (please refer to my first cheesecake recipe )
11. Bake for 15min. The temperature setting for each oven might be different. For my case, 175C for 15min can totally turn my cheesecake to dark brown color. So, you might fine tune for yours.
12. Let the cheesecakes cool down on the rack and then chill in the fridge.

Sunday, November 8, 2009

Roselle Swirl Cheesecake


I had tried to bake Blueberry Swirl Cheesecake a couple of time and the results was good. I got the recipe from my friend. After doing many research, i found this recipe is the simplest one among the bake cheesecake due to the blueberry pie filling can easy obtained from baking shop and the price is reasonable. However, i still wish to use flesh pie filling so i decide to use Roselle jam( the recipe can be found in this blog too) as the substitution. I use Oreo this round instead the graham crackers i usually use, Mcvitie's Digest. Here is the outcome! I like the contrast, black, white and red! Taste wise, Oreo crust slightly bitter might due to overheat although i just heat it at 160C for 5min. Oreo biscuit is dark in color so it might tend to absorb heat faster. Cheese is not sweet for this round might due to organic sugar is relatively less sweet than the normal brown sugar i use. Roselle pie filling does not have strong aroma as compare to blueberry pie filling which i expected. Overall, i still like it.

Prepare Time: 2 hours
Bake Time: 40-50min
Serving: 8 people

Estimate Cost: RM30

Ingredients for Crust:
Kraft Oreo Cookies 1 roll with net weight 137gram (cream removed)
Margerin or melted butter 2 tablespoons
Sugar 1 tablespoon (granuated) - optional

Ingredients for Butter:
Philadelphia Cream Cheese 1kg at room temperature (originally come at 2kg so i cut it half)
Eggs 4pcs
Vanilla Extract 1 teaspoon - optional
Sugar 3/4 cup

Instructions for Crust:
1. Break the biscuits into small pieces and put it in a small plastic bag. Crush into tiny pieces with a pin rolling on the bag. Some recipes uses food processor.
2. Place the cookies into a medium bowl and add in the margarine or butter part by part until the cookies turns moist or wet looks. Do not put all the margarine at once as some cookies might have different level of oiliness.
3. Apply some margarine on the 9 inch spring form pan, both bottom and the sidewall. This avoids the crust or cake crack at the side when removing the pan.
4. Pour the cookies mixture into the pan and press it down evenly on the bottom pan with a spoon. Ensure the outer boundary of the crust is also nicely press down. This step is crucial to ensure the crust is not stick to the bottom pan upon removing the pan.
5. Bake it at oven for about 5-10min at 160C or upon the crust turns fragrant. I strongly suggest to stay at the oven for close monitoring and get ready with your hand ware to remove the pan from the oven. Optionally, just leave the pan into fridge to get set while preparing the cheese.

Instruction for Cake:
1. To start with, the cream cheese should be left at room temperature for at least one hour before beating. Cut it into small cubes will fasten the beating process. This ensures no lump in the mixture in later stage.
2. Beat the cheese until smooth at low speed for about 1 or 2min. It takes longer time if the cheese is not resting at room temperature long enough.
3. Add one third of the sugar and beat until the sugar fully dissolve into the cheese. Add another third of sugar and repeat for the last one third.
4. Scrape down the mixture from the mix bowl side wall and do the last beat before adding the eggs. This is a crucial step to avoid lump in the butter.
5. Add one egg at a time and mix well. This step repeated until all eggs are added.
6. Add in the vanilla extract and do the last beat.
7. Pour one half of the mixture onto the crust.
8. Scope some Roselle pie filling on the mixture on a few spots and then cut it through in butter with a knife as long the knife does not touch the crust.
9. Fill up all the left over butter.
10. Preheat the oven at 220C.
11. Put a tray at the bottom rack and fill it with hot water. This water bath will ensure the cake will not crack and remain moisture.
12. Put the cake at the middle of the rack and bake for about 35-40min or when the butter turns brown on the surface. The surface will have uneven brown look.
13. Remove the pan from the oven and let it cools down on a rack.
14. Cover the pan with a aluminum and chill it over night in frige after it fully turns cold.
15. Top up with the Roselle jam the following morning before serving.

From my personal opinions:
1. I had tried with bake or no bake crust but the outcome is still the same, the crust is still soft after chill. So, i would recommend not to bake it. Moreover, the crust is already bake in the manufacturing, additional baking will not much changes the aroma.
2. Dont worry with the brown surface as it will be covered by the pie filling.
3. Crack cheesecake at the surface will not affect the taste but only the outlook. Usually it will be also covered by the pie filling afterward.